
Installation
|
|
First of all, have an electrician install an outdoor power-point in an appropriate place. The electrician will connect the power point to a power source depending on how you have decided to have your garden lights switch on and off. (See FAQ - How you will turn off and on your Garden Lights?)
12 volt Garden Lighting DIY Instructions:
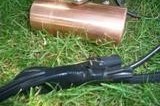
Transformer- Install the transformer on a wall of the house, the garden; shed; or a fence post, close enough to plug the transformer into the outdoor power point, and more than 300mm above the ground with the cable terminals on the bottom of the transformer. There is a cord and plug attached to the transformer which will plug into the outdoor power-point transformer. Make sure you unplug the transformer before continuing.
Prepare- Place each light fitting in its approximate location that you want them to be installed. Run the cable out laying it in reach of the lights. Make sure that if the cable is going under a path or the like that this is done now! (See FAQ- How do I get cable under a path?)
Start connecting- Connect cable to the transformer. All the transformers come with a short length cable of 12 volt cable attached. You will need to connect your main cable to the transformer cable and then run the cable around the garden ready to attach your new lights.
Light fitting installation- Begin fitting the lights. We find it best to begin with the light closest to the transformer as this means that you will not run yourself short of cable.
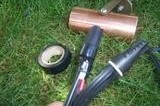
Light Fitting Method:
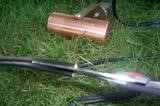
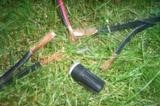
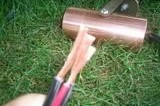
1. Cut the cable where the light cable is to be joined.
2. Split cables
3. Strip wires using the connector as guide for length.
4. Note: strip wire about 5mm shorter than connector.
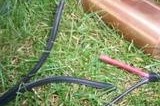
5. Gather together one wire from each pair of wires.
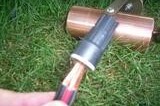
7. Tape to secure. (optional)
8. Repeat step 4 and 5 with other wires.
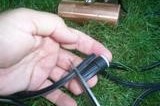
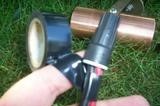
9. Tape cables together to secure and make the join easy to cover.
10. Repeat with each light fitting down the line. The end light is connected to the end of the main cable
11. Plant the lights where you want them and adjust the vertical tilt if needed.
12. Test: When all the lights are installed to your satisfaction, plug the transformer into the outdoor power-point and test the lights to ensure everything is operating correctly. If not see ‘Troubleshooting’ below.
13. If you have a timer, set it now.
14. Conceal cables under the ground, bark, gravel, etc.
15. At dusk, fine-tune the aiming angles of the lights.
16. Pour yourself a nice glass of wine and enjoy!